cdaringe
learnings, nerdisms, bicycles
about
rad
freshawair
up'n'up
pl selector
dvd.js.org
standup
donut
cowtown
truth.lol
fish.js.org
factorio-type-kit☠
red-or-green☠
senor-salsa☠
laser lamps // a very maker christmas
January 17, 2016
files and bill of materials for this blog post may be found on github @ https://github.com/cdaringe/laser-lamp. You may also find some info here: http://www.thingiverse.com/thing:1282589/edit
motivation
gifting is a drag if it's a chore, and gifting should never be a chore. given that i wasn't going to see most of my family and friends this christmas (because i recently moved out of state) planning what to do for everyone felt more stressful than fun this year, at least at first. it dawned on me that i could do something easy, but my friends and fam deserve better than that! i recently joined quelab, the friendly neighborhood makerspace, which is just a short bike ride from my place downtown albuquerque. the folks down at the lab were kind enough to let me roam wild using their myriad of tools. i hence decided that i would craft everyone fine-novelty-gifts™ for the holiday. but what to make?
inspiration
i recently left oregon. i miss it. i miss the forest. i miss the sweet, sweet, smell of junipers in bend. i love wood, and hot damn, do i love this quelab laser-cutter! so, let's mix wood and lasers. done.
in my free time, i periodically peruse a couple of design sites. i casually passed by the kerf lamp and immediately fell in love with it. it's creative, unique, and undeniably gorgeous. let's make everyone these! yahoo!
kerf build
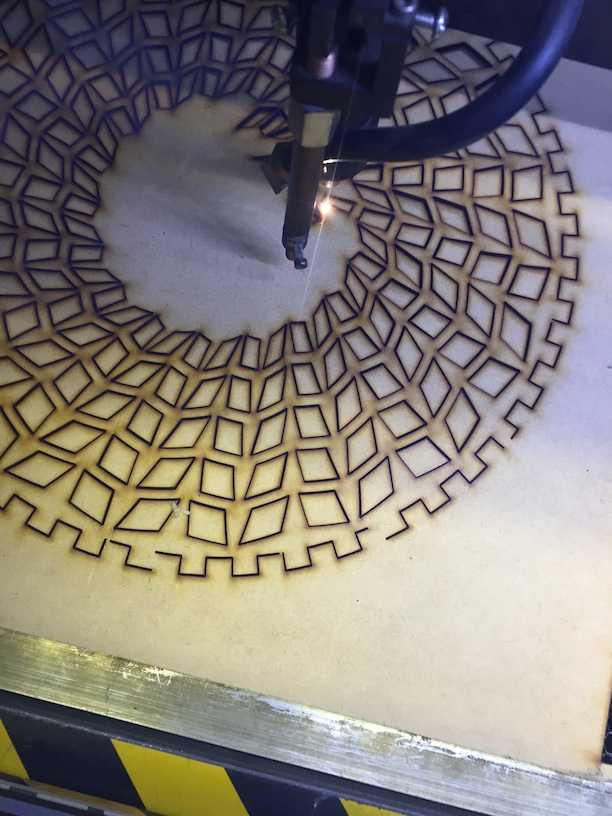
the kerf lamp files are ready to go for cutting right off of their instructables page. the full design specifies to use 3mm thick mdf as the wood-of-choice. the downside was that no one in the usa carries 3mm mdf unless you buy in bulk from distributors. some tiny pieces are available, but this lamp is big, and i needed 2' x 2' panels. i was unwilling to buy 50 panels for my project (surprise). after calling every possible vendor in the general albuquerque area, i nearly gave up. i then found one gentleman post on a hobby site that he had done laser work with mdf purchased from lowes, however it was branded as 'subfloor panelling'. i finally found some of the panelling, and had the ultra-grumpy lowes serviceman cut it up into 44"x48" chunks. the panelling was labelled formaldehyde free, so i felt it may be safe to laser cut.

i cut it up and it looks great! however, one side of the panel material has a thin vaneer on it, and the rest of the mdf consistency was not heterogeneous. these panels did not bend well, and ended up cracking.
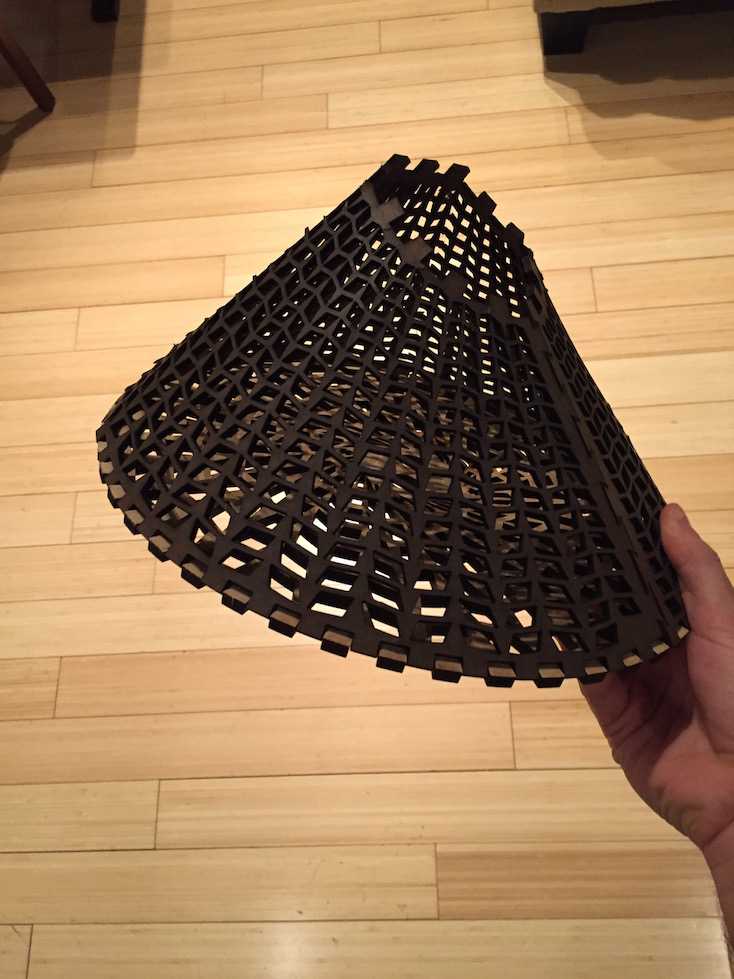
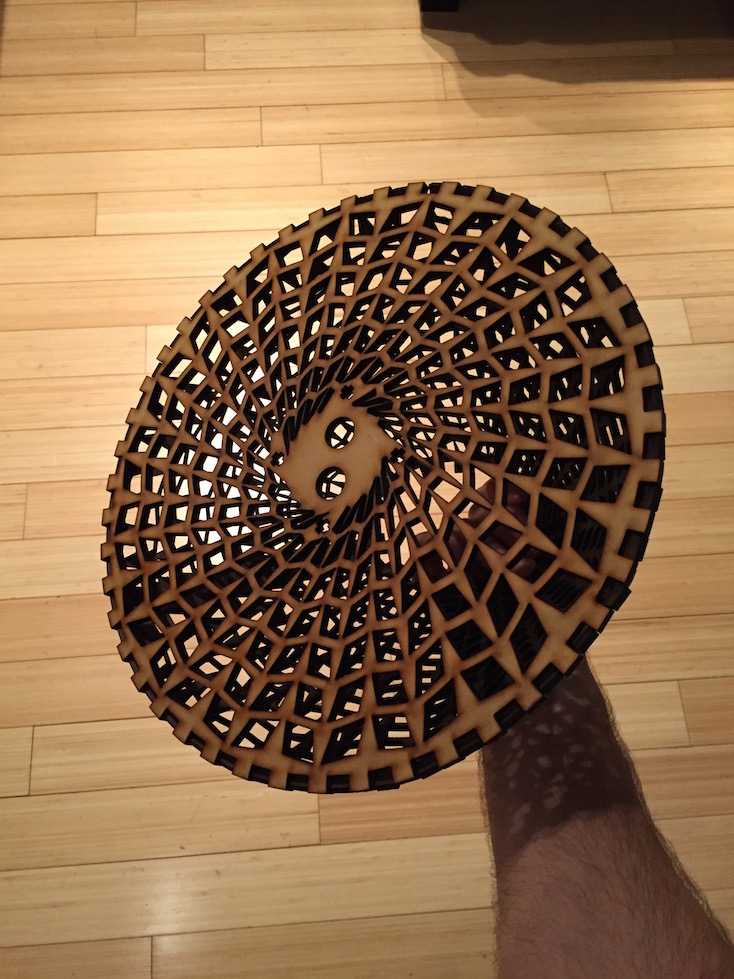
here, i have joined the upper cone to the top circle member. so close! from a quick look, you'd think it was successful. however, many cracks, peels, and poor joins occurred. if you look at the opening towards the top, you can see how a couple of "square-ish" sections are present. such a geometry would not mesh well with the lower cone.
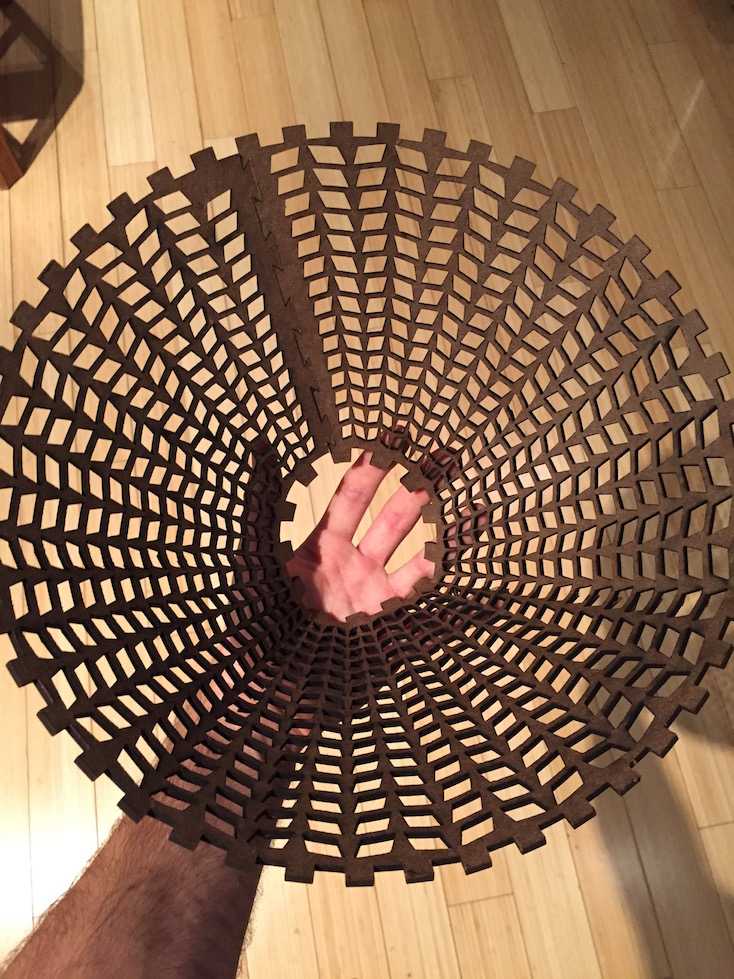
a friend and i both sadly agreed that the quality just wasnt there to proceed. i could not get a high enough quality mdf, and other woods simply wouldn't offer the multi-axial bend demands that this design warranted.
however, much more importantly, when i returned from a long evening of cutting (easily 4-5+ hours standing in front of the laser for just these pieces shown above), i had a moderate nose bleed. it's high altitude up here, and winter nosebleeds are indeed common. however, some mdf is known to be unsafe to cut due to the byproducts of the burning resins. after this event, which i cannot firmly attribute to my new climate or the wood itself, i was unwilling to cut this material again. i trashed all of my panels as it was not worth risking my health.
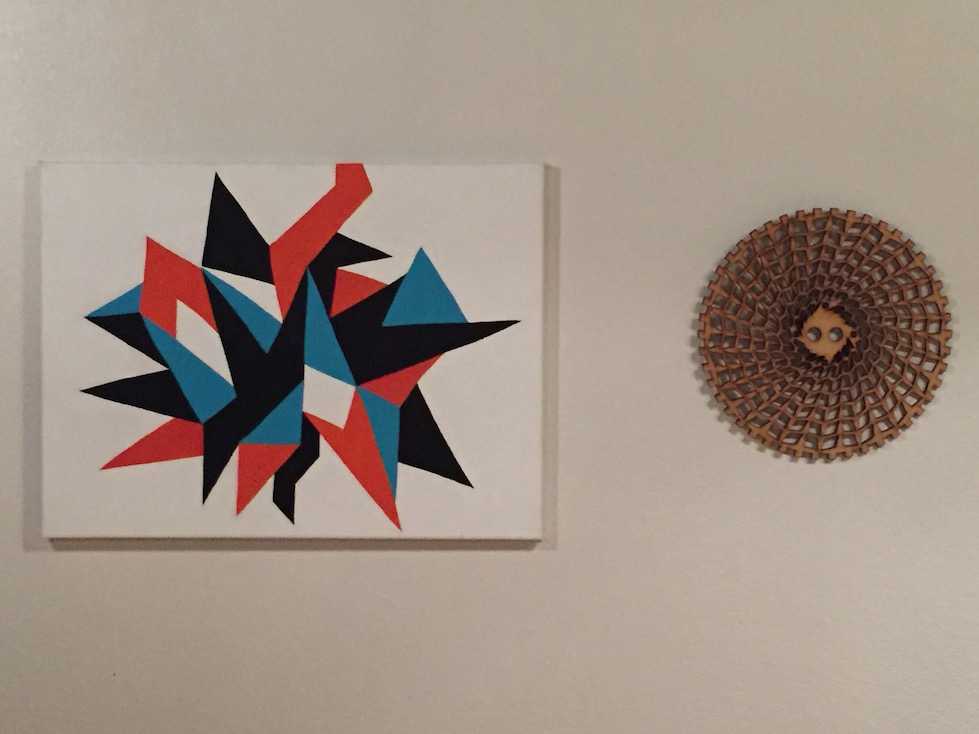
after assembly of the first lamp failed, i was very distraught. days of planning, material sourcing, cutting, and cleaning all seemingly went to waste. if there was any good to be taken from the experience, i at least gained a great wall ornament!
inspiration, attempt 2
christmas was getting pretty close (<1 week away), and i had nothing to show. i did end up ordering a myriad of electronics for this kerf project, and i still loved the intent. well, i was going to visit my old best friend kit way out in chicago, so i couldn't bring a giant lamp anyway. so, what if i simply kept the kerf lamp intent, but downscaled and simplified it?
vvvv-wala! done.
simplified build
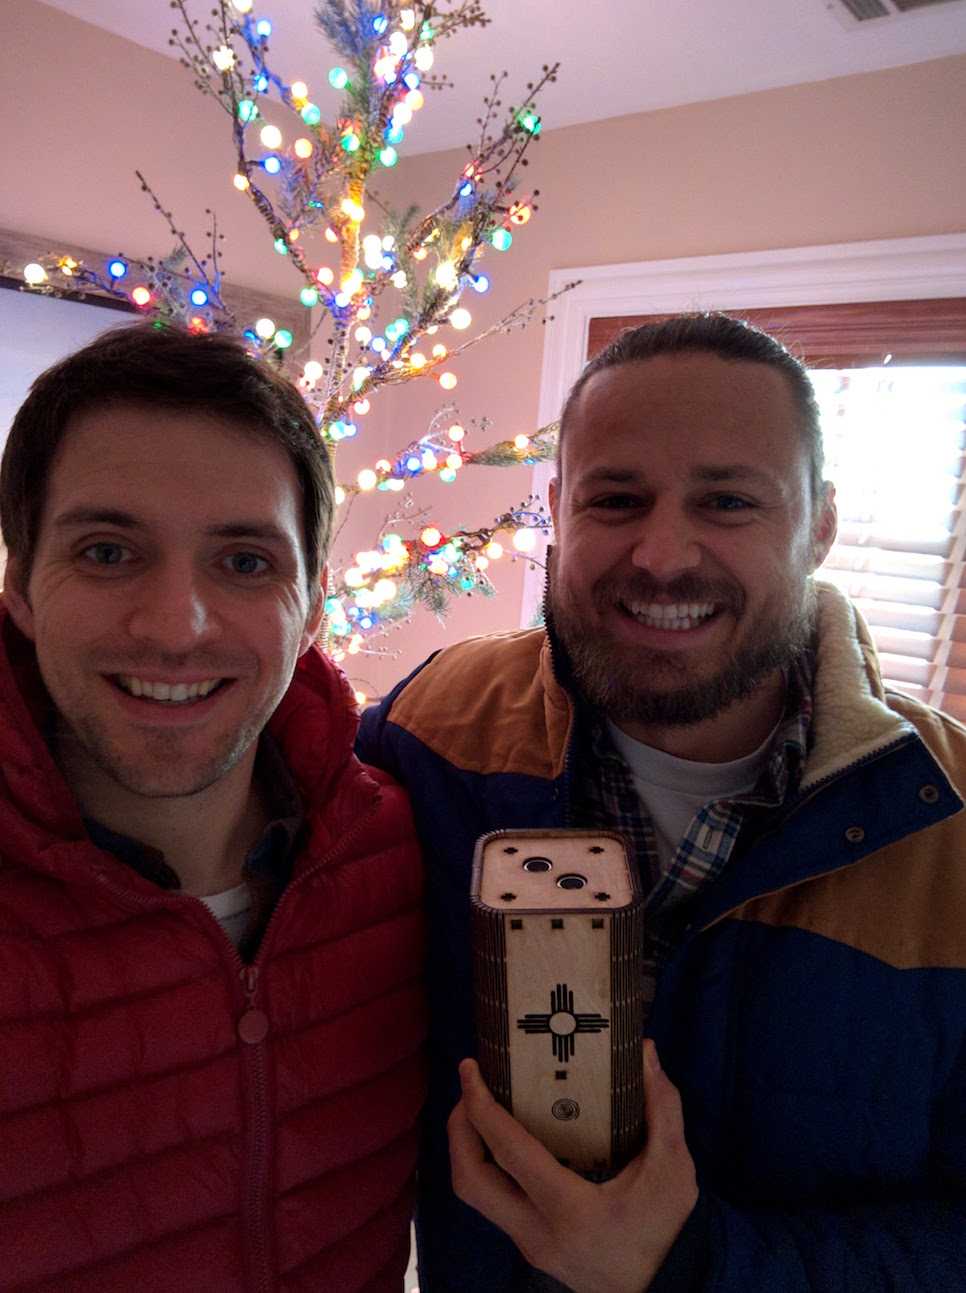
first off, before we begin, this build was a great success. christmas was saved, and kit loved his lamp.
design files
first order of business is designing the files. my strategy was to commandeer the distance sensing interface from the kerf design, but use a swanky wooden box as the base of my lamp. SimonFront made a pen holder box that was just what i was looking for as a base structure. check out the comments on the design. he had 6k+ downloads, but clearly there was an issue with some overlapping vectors. i raised an issue and he corrected it immediately. it makes me wonder what all of the other folks who downloaded it really downloaded it for, ha! they couldn't use it as was. regardless, i'm grateful for his work. thanks simon!
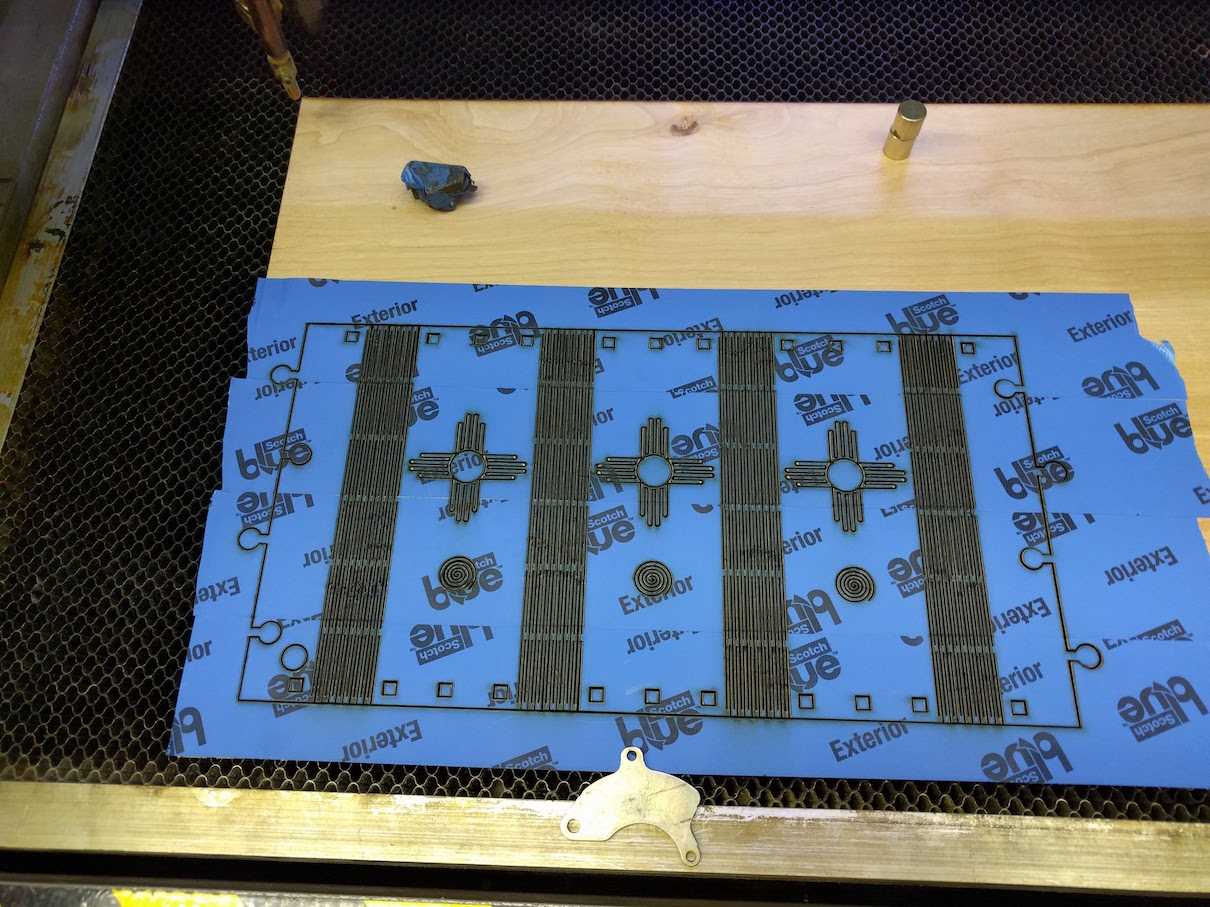
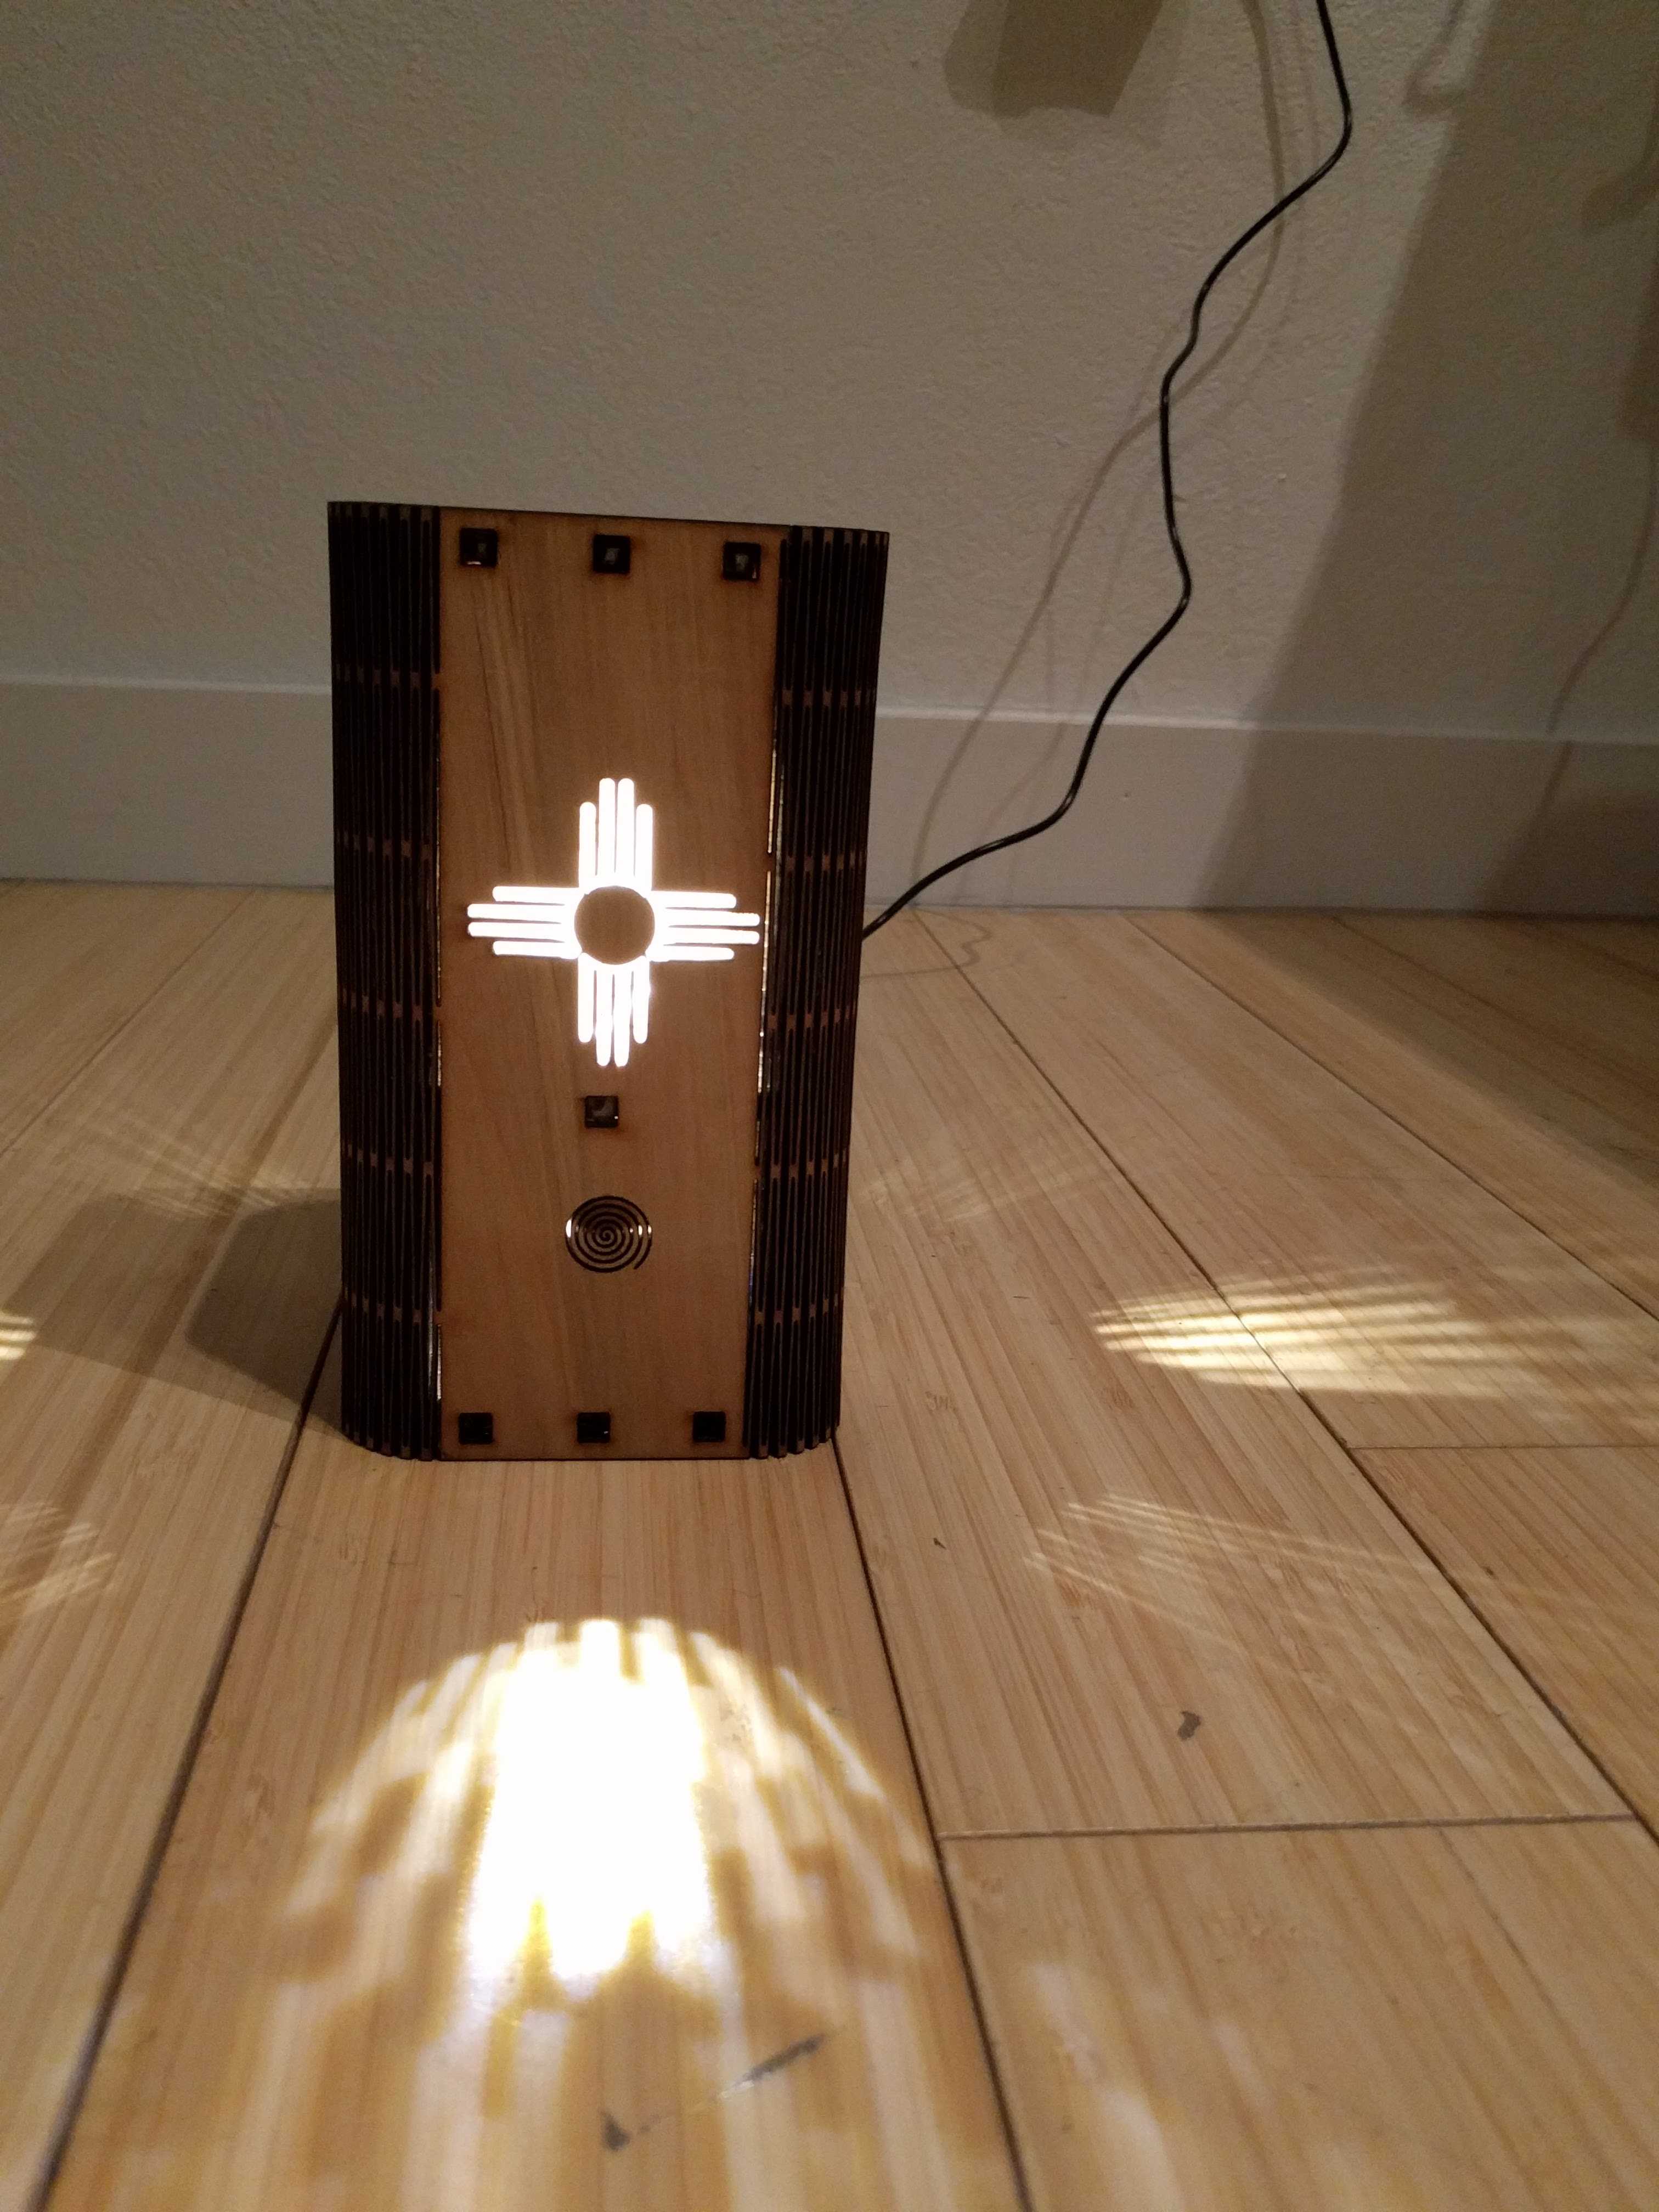
i merged the kerf-lamp's distance sensor interface into pen holder top piece, and modfied the sensor brackets to fit into the small box. i added some zia art and other misc flair to land on the following cut paths!

the blue components are 3mm thick, and the
red are the imperial equivalent of 5mm (~0.19"). so please note, this is not a single cut file--you must separate the different thickness components into multiple cuts.
mechanical assembly
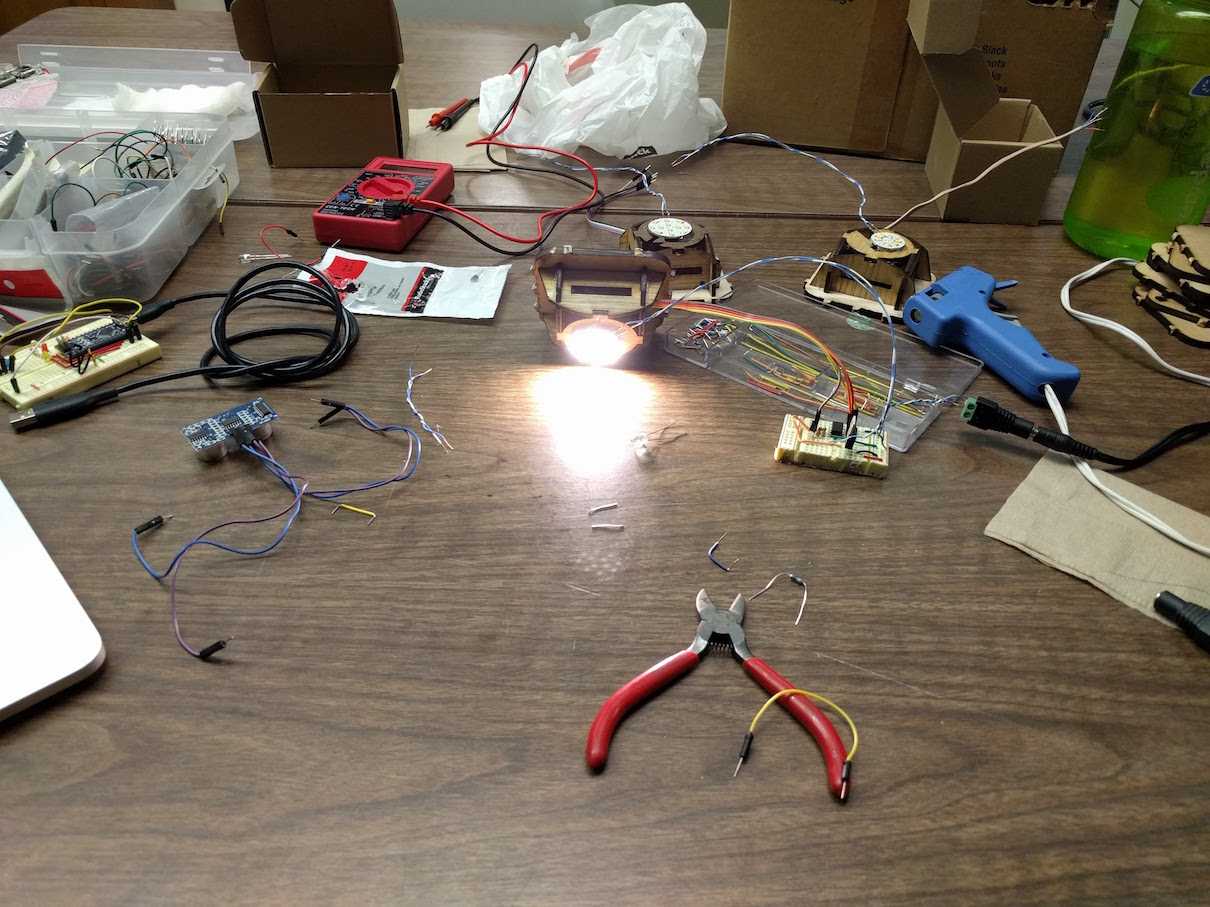
because i was making a few lamps, i didn't cut my pieces out in a single wave. i had some design iteration to get through. regardless, here's the lamp assembly (without internal support squares) fresh off the laser.
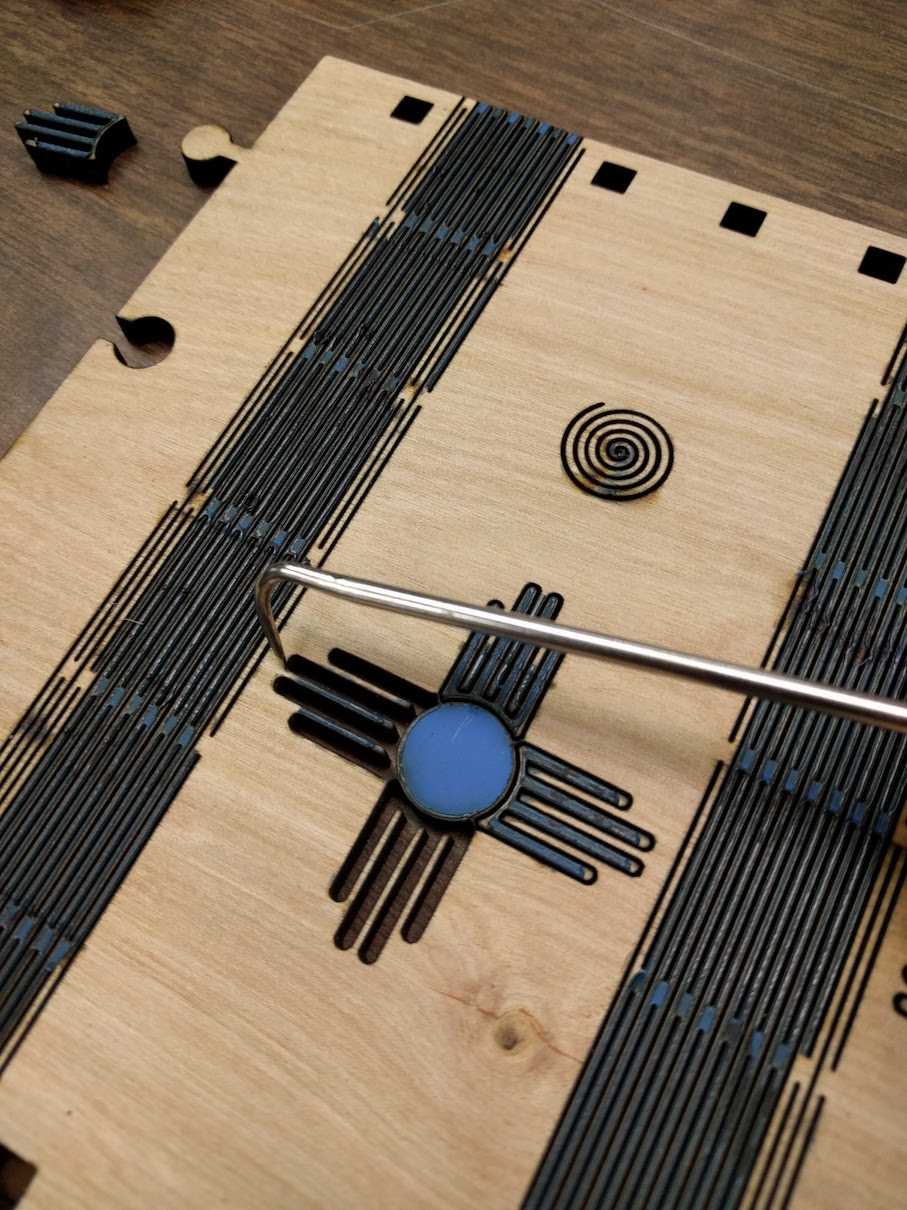
cleaning all of the tape out of it takes a long time. good thing i have a stabby tool :).
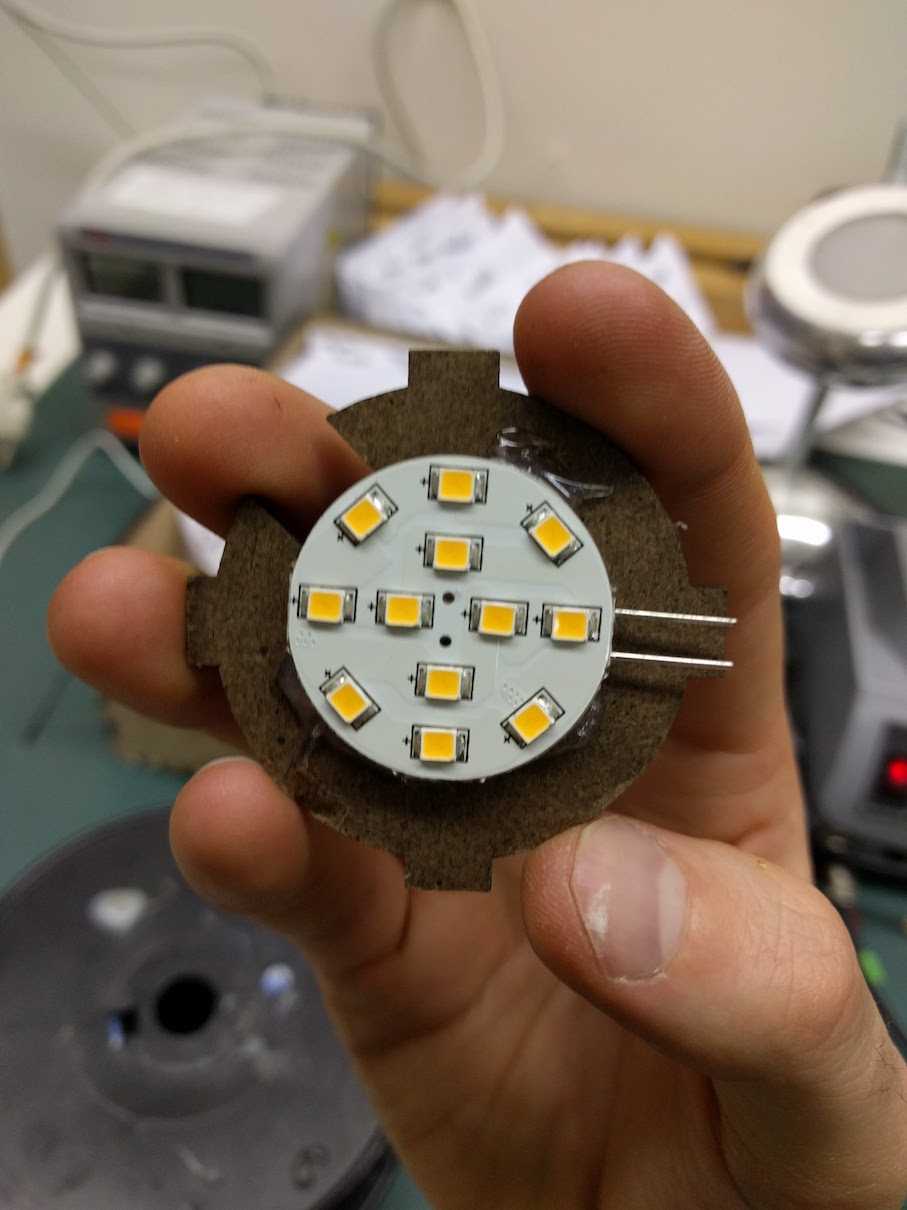
after my ultrasonic sensor mounting components finished cutting, i shot some hot glue on the back of the LED assembly and mounted it to the disc.
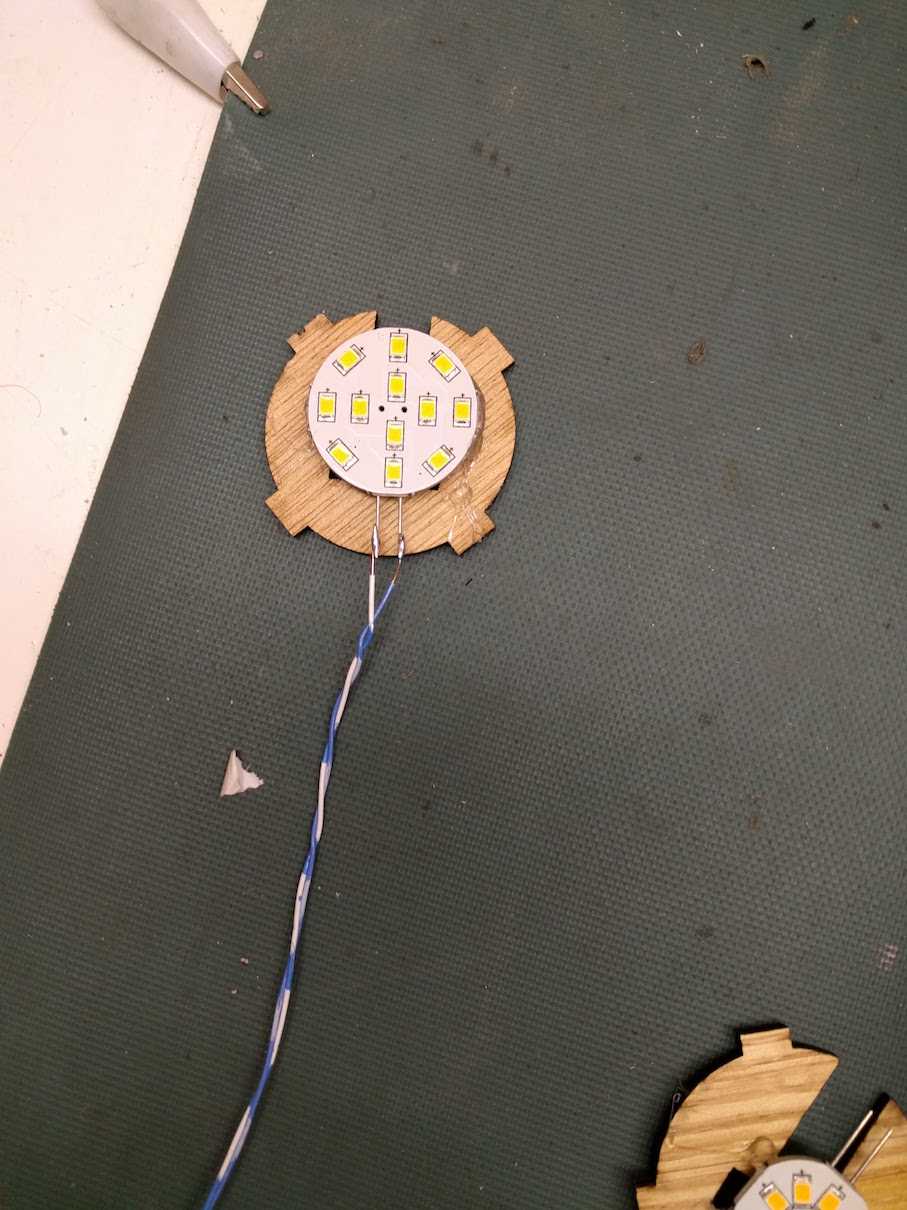
soldered some 8" long solid core wire pair on.
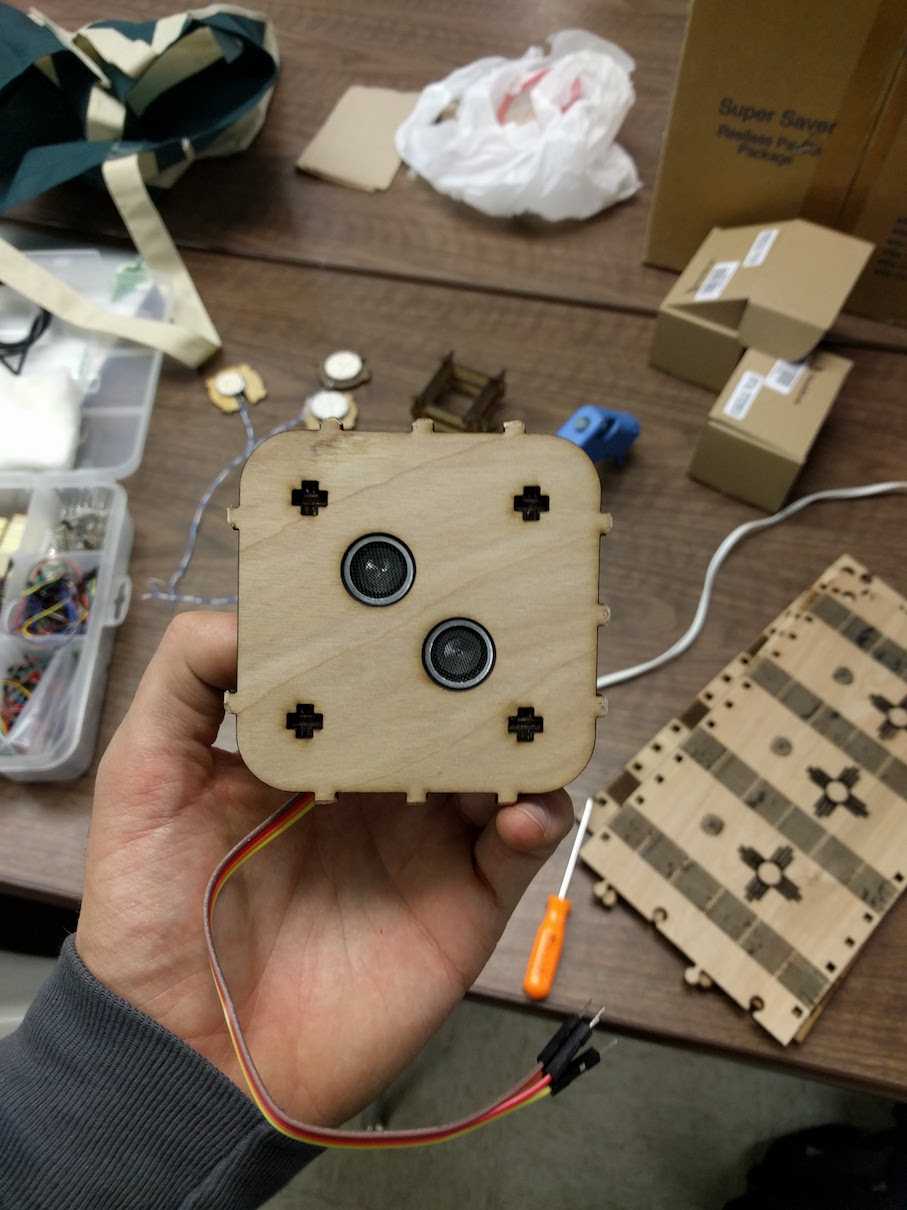
assembled the ultrasonic mounting brackets, pressed them into the top square of the lamp, and shoved the sensor in.
ooouu. aahh. eeeeee...
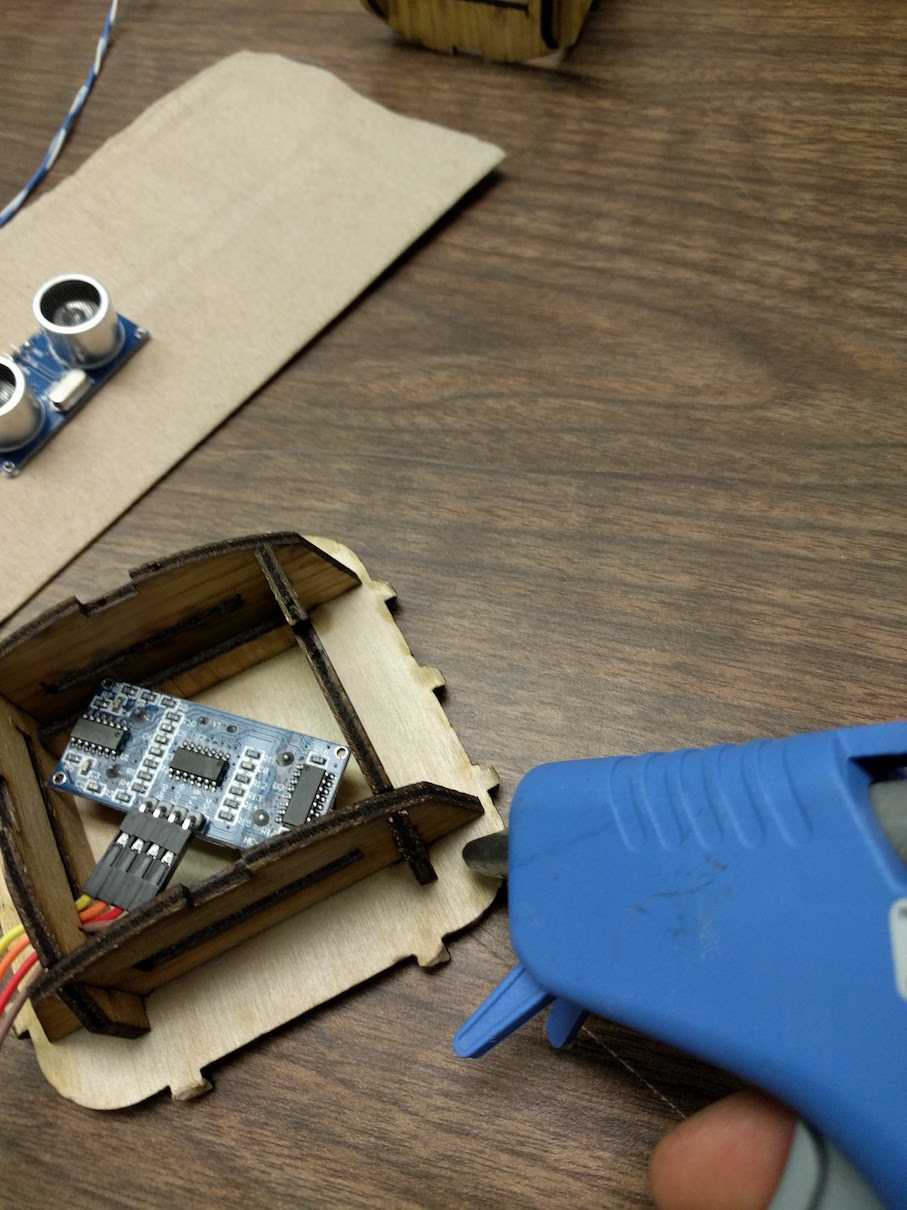
i probably didn't need too, but i shot a little hot glue on critical mounting surfaces/joins.
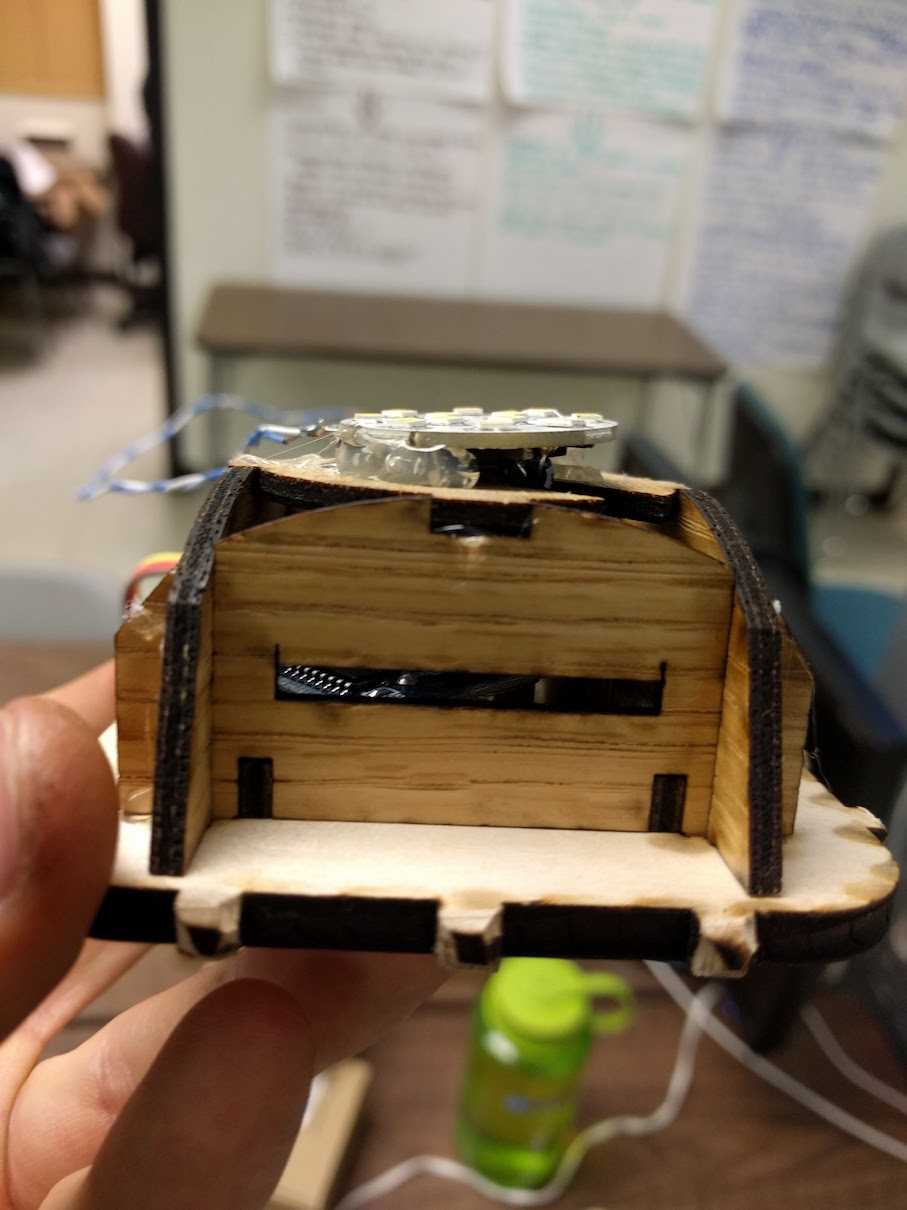
the LED disc mounts so nicely onto the sensor mounting structure. glue that bad boy down too. it's all a nice press fit already, but vibration is a real thing to worry about.
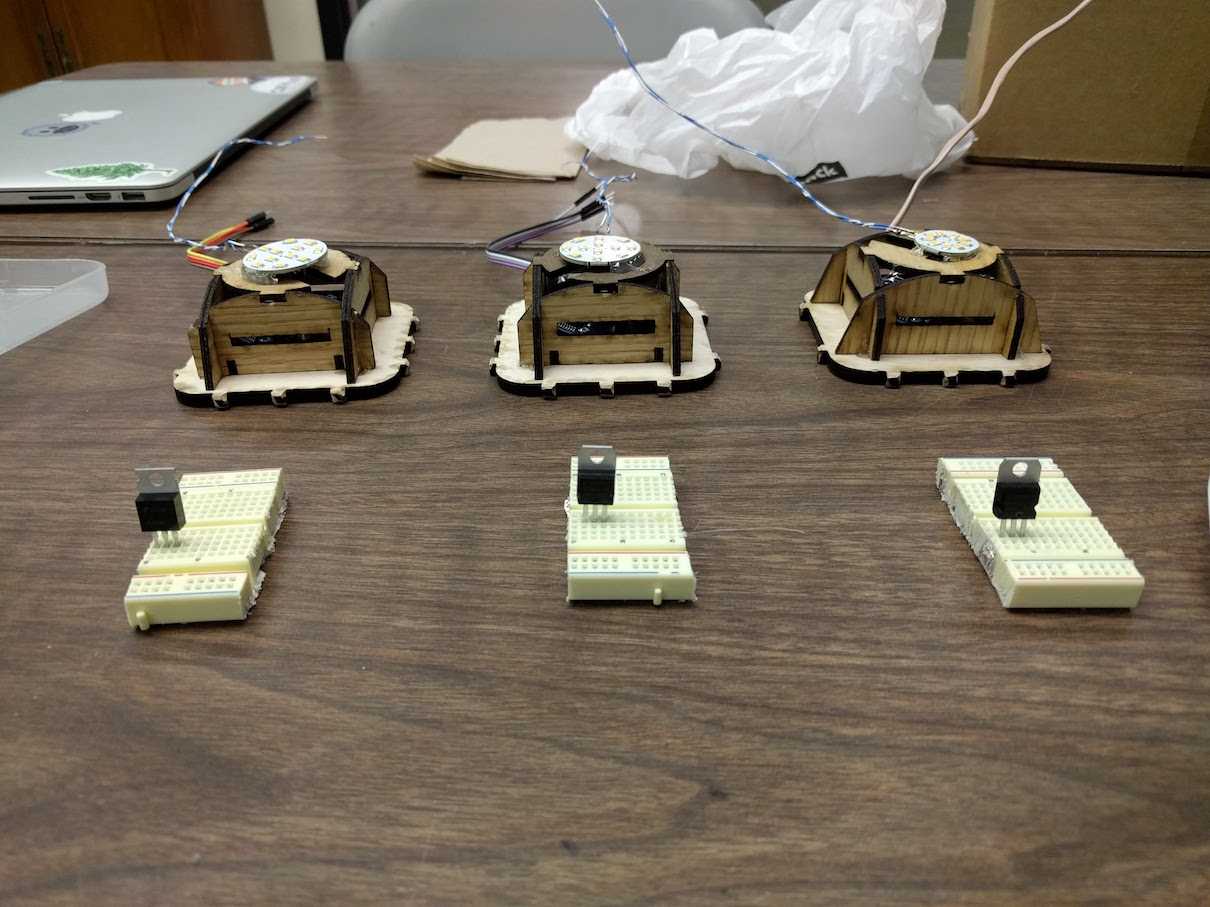
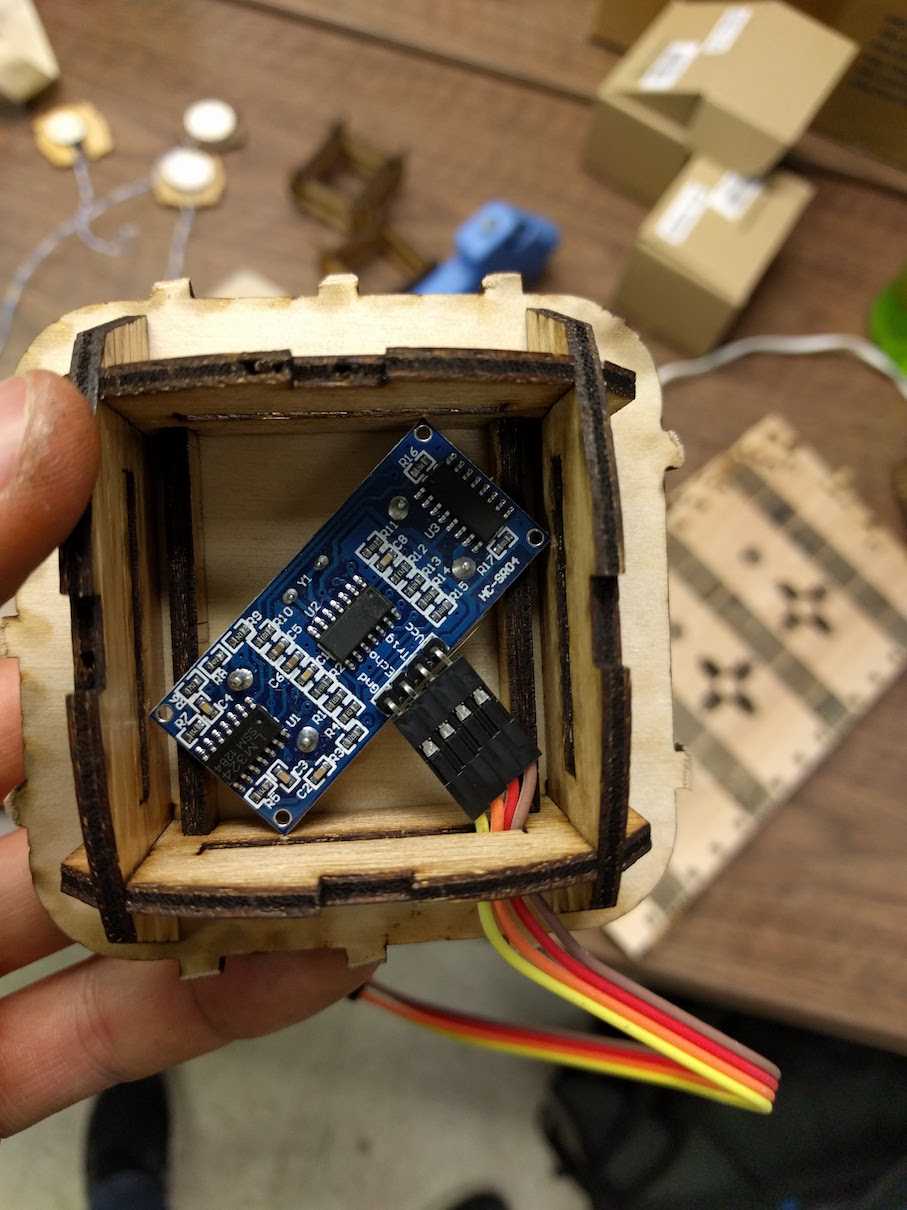
prepping the electronics. you'll note that i chopped apart a breadboard into a few sections from the photo above. BIG MISTAKE. two of the four didn't work and had some internal shorting. i ended up ordering some mini breadboards (well, at least for the last 2 of 4 lamps).
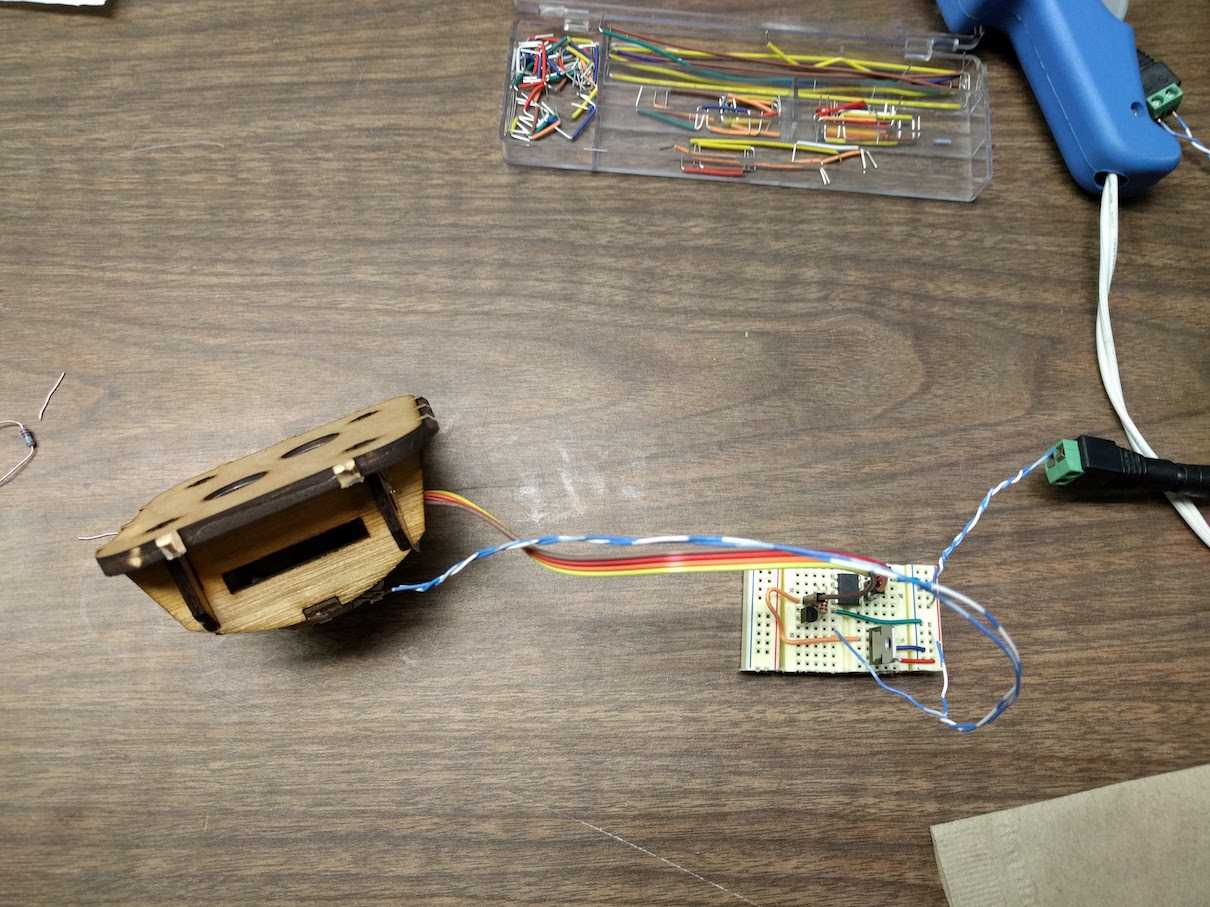
wire it up, essentially per the kerf instructions. NOTE, i'm missing a big step here, and that is the programming of the ATTINY. i didn't have a programmer cable. i did have an arduino nano, however. turns out you can use an arduino as a programmer for another arduino. how cool! this tutorial totally saved my bacon. thanks martyn! i built a little programmer board and got all of my ATTINYs programmed in bulk.
testing went OK! i iterated a few times on the code. some design challenges were:
- jittery hands would produce jittery light, so a little bit of debouncing was done. i ended choosing a simple median approach from 10 rapid samples. i seem to recall
- giving the lamp an intuitive user experience. note the fade effect when turning the lamp off. gotta make the thing look good!
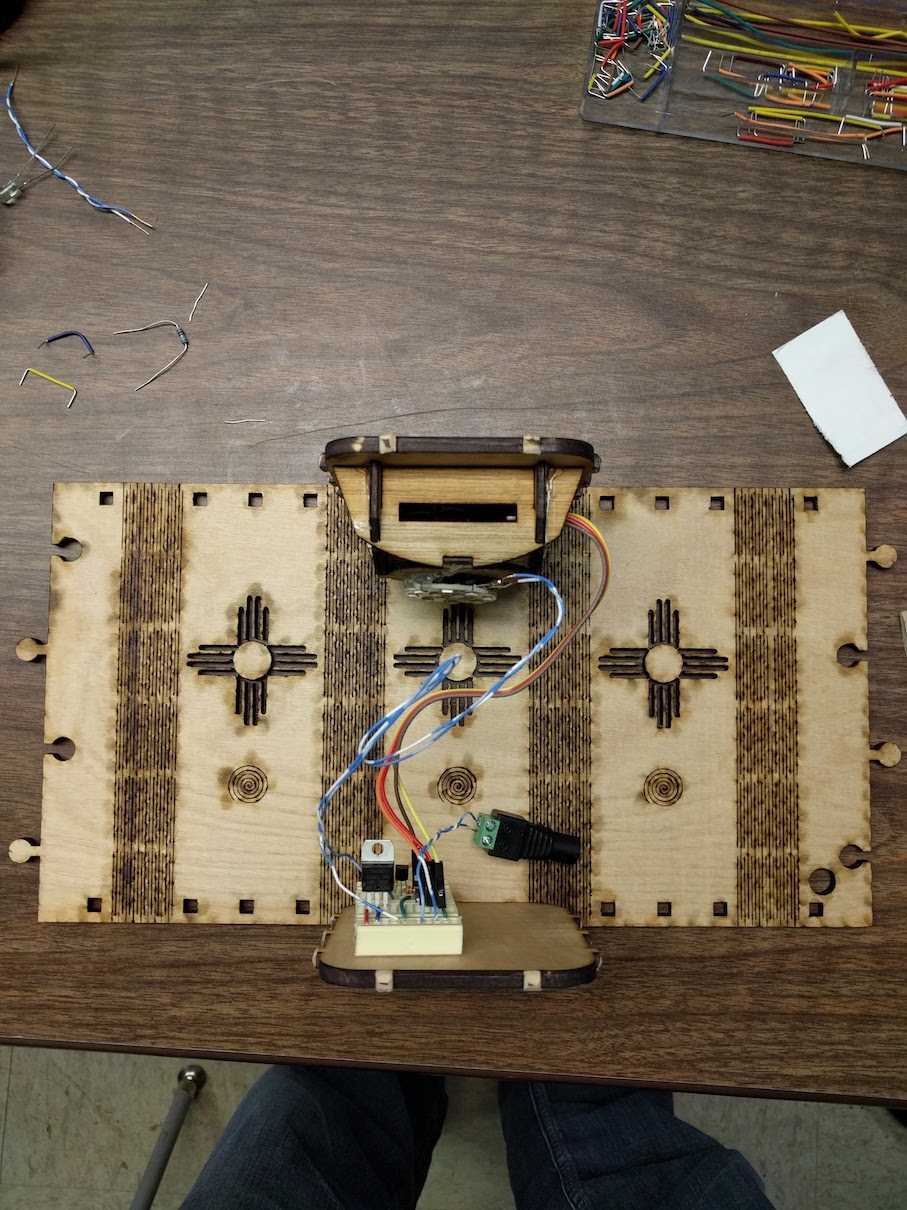
stick the breadboard to the bottom panel. mount some panels! you may note that the this particular lamp doesn't have a middle layer. i do recommend using the middle layer. it helps give the lamp some structural integrity, as well as helps you to close the lamp with the final puzzle-piece-joins without fear of snapping anything.
this is also the right time to firmly press (and gently twist in) the power adapter.
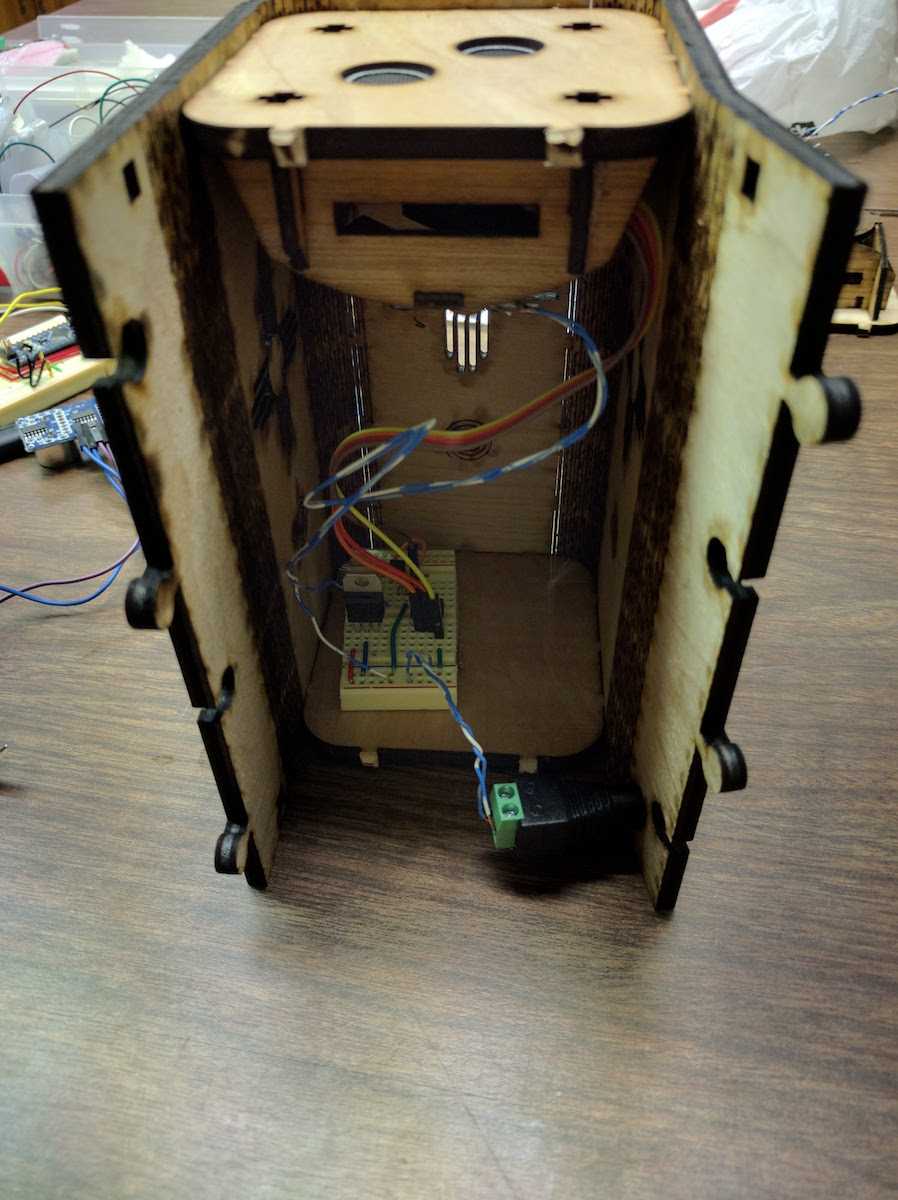
close up the lamp and we're all done!
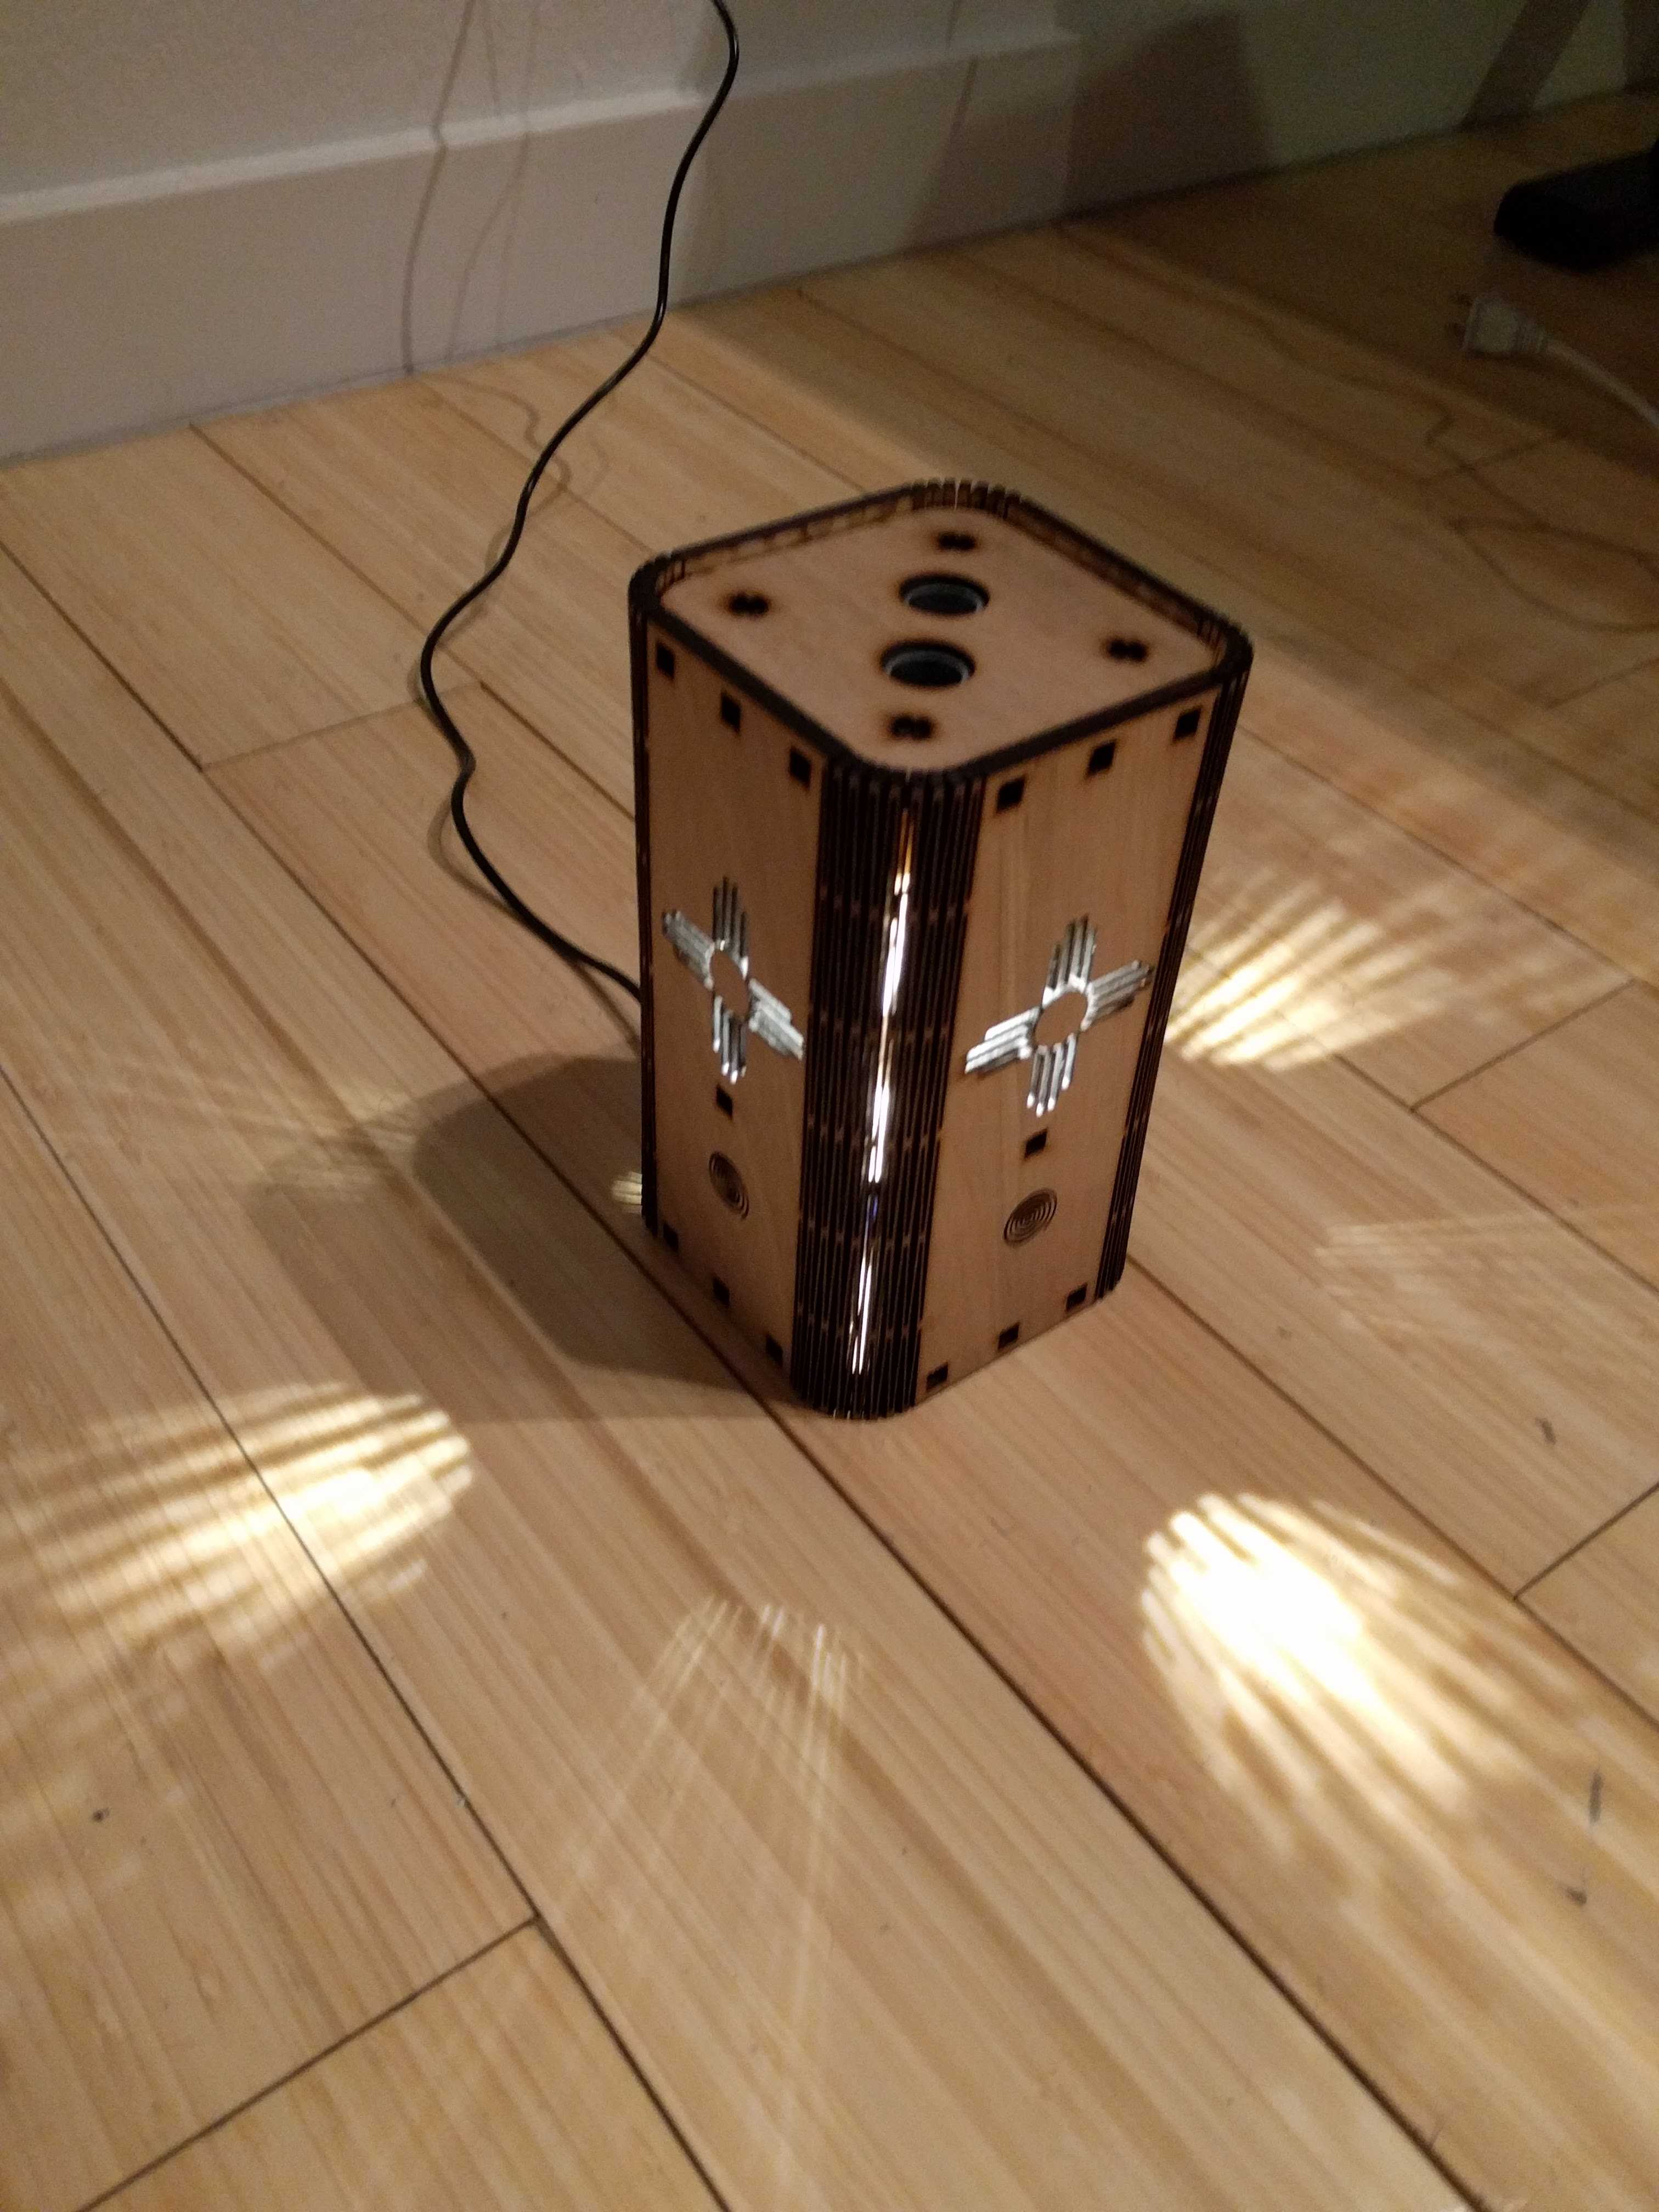
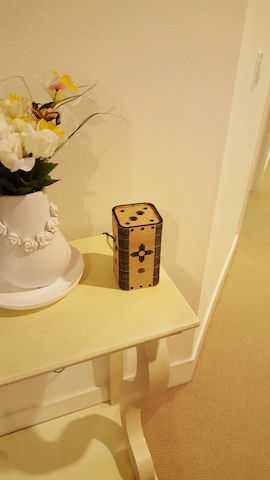
here's the lamp i gave to my brother and his wife.